This article in mainly dedicated to help my guest writers upload and publish their artiles on TheTrendyCoder website. At the same time I always like to share the content I create. So I told myself, why not publish it here so maybe it can help others to learn how to write articles on WordPress with the use of Elementor page builder plugin.
First of all, I want to tell you why I use WordPress. As a developer, I always thought I would code my own website. I would do a fancy website in Angular or something like that. And I tried to do so, for years… Every time, it was taking me ages to set up the basics. Then I would have a new idea and start over with a new framework or a new approach. So instead of focusing on the content of my website, I was just working on superficial coding that wasn’t even teaching me new skills. Then, I had to help a colleague on a WordPress website and I realized it was much more easy because in some click I could have a whole website already created and online. then I will just have to learn how to add plugins, structure my content, discover SEO…
That is how I started to work with WordPress. I started with a very ugly website, thinking it wasn’t that bad. And every time I discover new features, new plugins, and new SEO rules, I realize how bad was my old work. So I keep practicing, learning, and optimizing my work step by step, day by day, month by month. As a guest writer, I want to allow you to go through these steps if you never had any experience with WordPress. You can learn, test, exercise, ask me questions… You can even give me advice If you have more expertise than me. I really see that as a way to connect with people and share an experience that I hope would benefit all of us.
- Log to the backend
- Create a new post
- Elementor page builder
- Create the first block
- Add heading
- Add an image
- Save your work
- WordPress Editor
- Select a category
- Add tags
- Optimize SEO
- Preview and publish
- More
Log to the backend
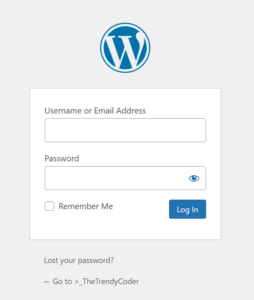
To access the backend of a WordPress website you need to add /wp-admin at the end of the URL. For example for my website you will have to use this URL : http://thetrendycoder.com/wp-admin/
Obviously, for security purposes, the backend is secured by a username and password. As the owner of the website, I have admin access. As a guest writer, I have created an author profile for you, so you can use your username and the password you set up.
Once you log in, you will have access to the WordPress dashboard, where all the magic happens. To be honest, you will see how easy it is to use.
Create a new post
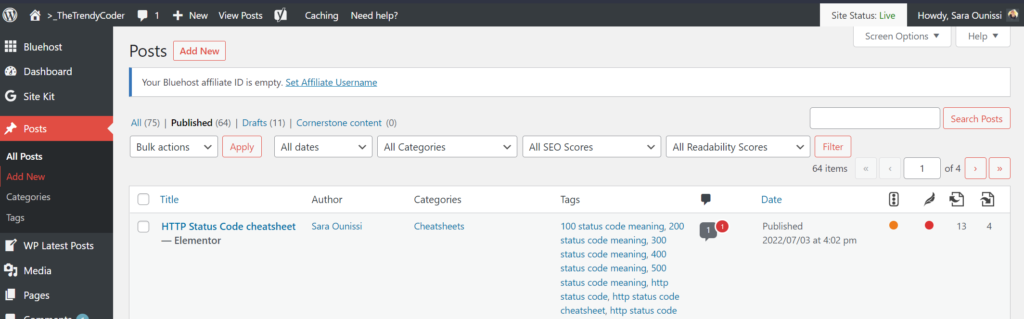
In the left sidebar, you will have different options. The one that interests us here is Posts. If you click on All posts you will see the list of all the posts you created. You can click on every one of them to be able to modify etc…
In our case, we want to create a new post, so you can select Add New in the left sidebar or at the top.
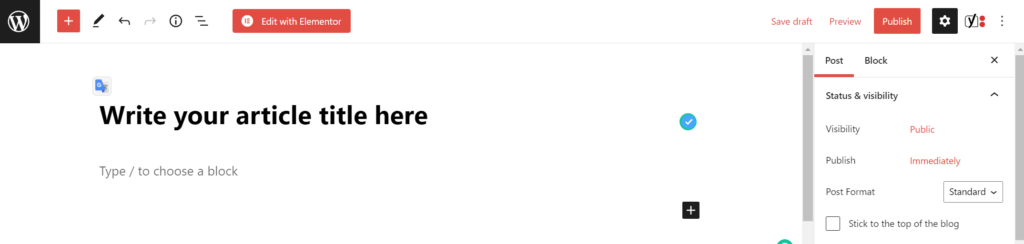
You will have access to the WordPress basic editor. On this interface we won’t write the content of the article because I like to use elementor for that. Elementor is a page builder that helps the user with creating a page or a post with drag and drop features. It is really easy to use and to customise. So it looks way better than simply using the WordPress Editor (witch I did until a few months ago when I discovered elementor).
However, you can’t only use Elementor, you still need to fill in some important information on the WordPress editor. The main things we will have to do here are title, SEO, tags, and categories.
You can start by writing your title as you can see on the screenshot. Then click on Edit with Elementor to have access to the Elementor page builder. We will come back to the WordPress editor later to add the SEO meta description, the category of your post, and the tags.
Elementor page builder
Once Elementor is activated, that is the page you will have. The gray area allows you to create new blocks or import templates. On the left sidebar you have all the blocks that you can create, and you can just drag and drop them in the corps of your post to start.

Create the first block
For example, you can select the block Text Editor and drag and drop on the gray area. You just created your first block.

Now when you select the text block you will be able to modify its content on the left sidebar. As you can see, you have three tabs: Content, Style, and Advanced. In our case, you won’t need to alter the style because most of the time you will only use basic text blocks and images. So you won’t need any fancy additional styling. And in the advanced tab, you can have access to motion effects, etc… Things that I don’t use in my articles but can be really nice on some pages of the website.
For the following elements that you will need to add to the article, you just need to drag and drop, but this time not on the gray area but below the block already created. If you drop it on the gray area, it will work, but you will have two blocks in two different groups.
Add heading
Organizing your text with different levels of heading is very good when you write an article. It helps the reader see the structure of your content. It also makes your text easier to read and adds some dimension.
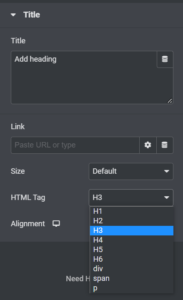
To add a heading, just drag and drop the heading element to your article.

By default, the heading that will be displayed is an H2, it means that it is a level 2 heading. As the title of your article is a level 1, you mustn’t have more than one. this is a very important SEO rule. Structure is very important. Only one H1 is required on a page. Than you have to choose between the other level H2, H3, H4, H5, H6 depending on the structure of your article. You can change that on the leftside panel.
Add an image
Images are great in articles, it adds some illustrations and space. So to add an image, you just have to drag and drop the block image below the element where you need your image to be.
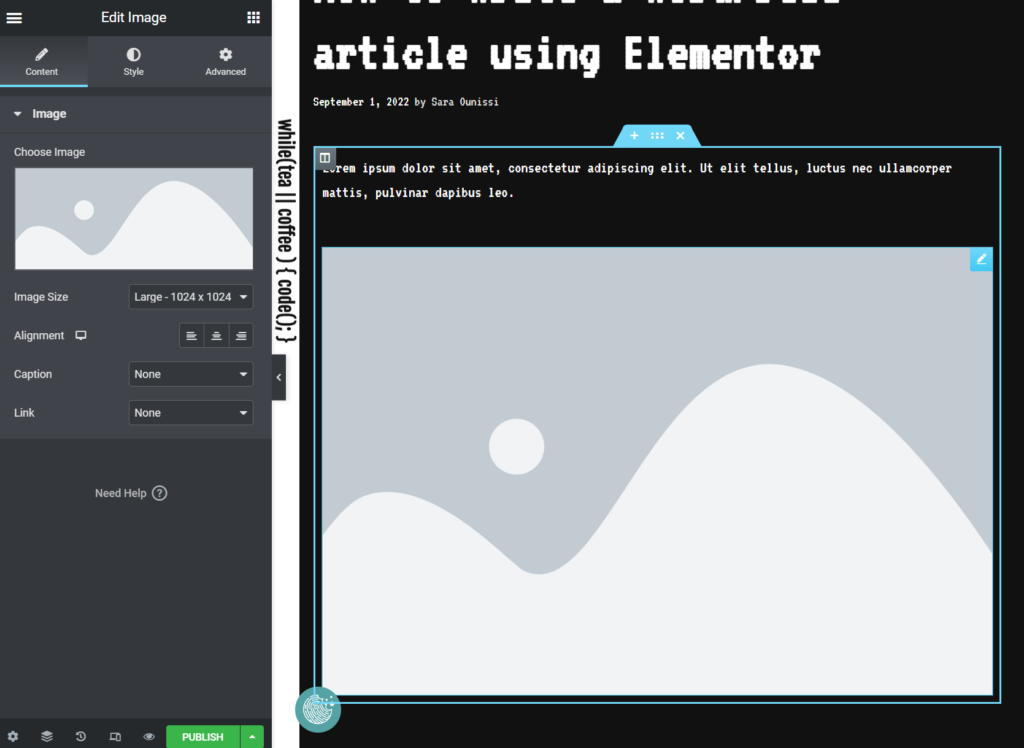
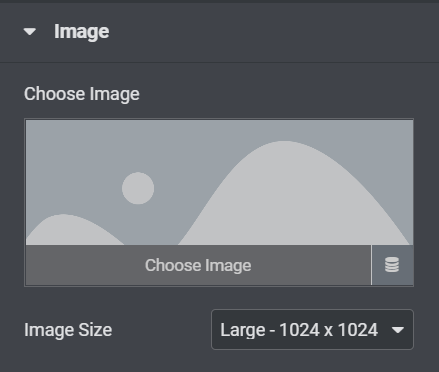
On the left sidebar, you will have all the information related to the image: the file, the size, alignment, link, etc… Here you will want to upload your image. Hover on the image and a button Choose Image will appear. Click on it.
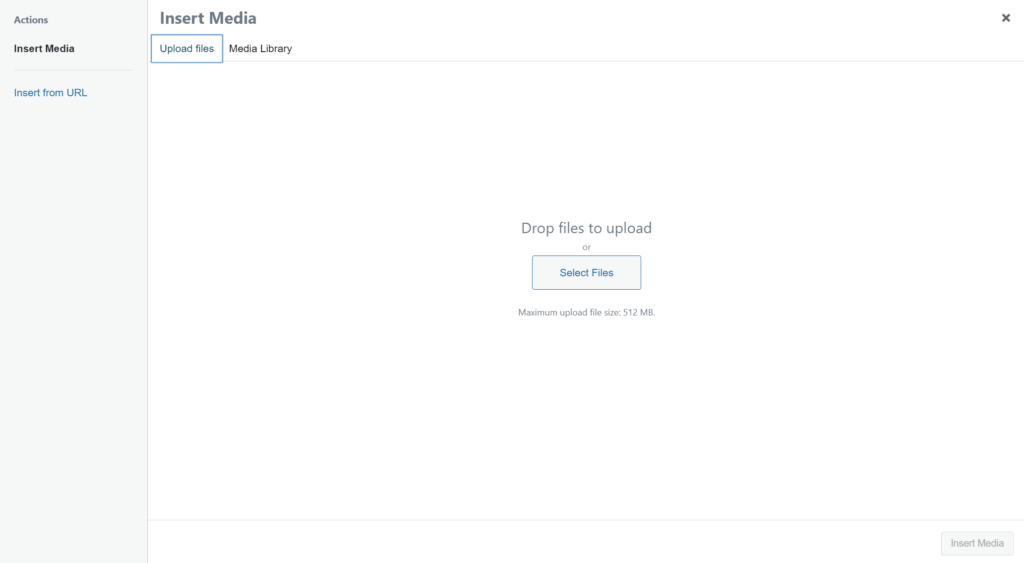
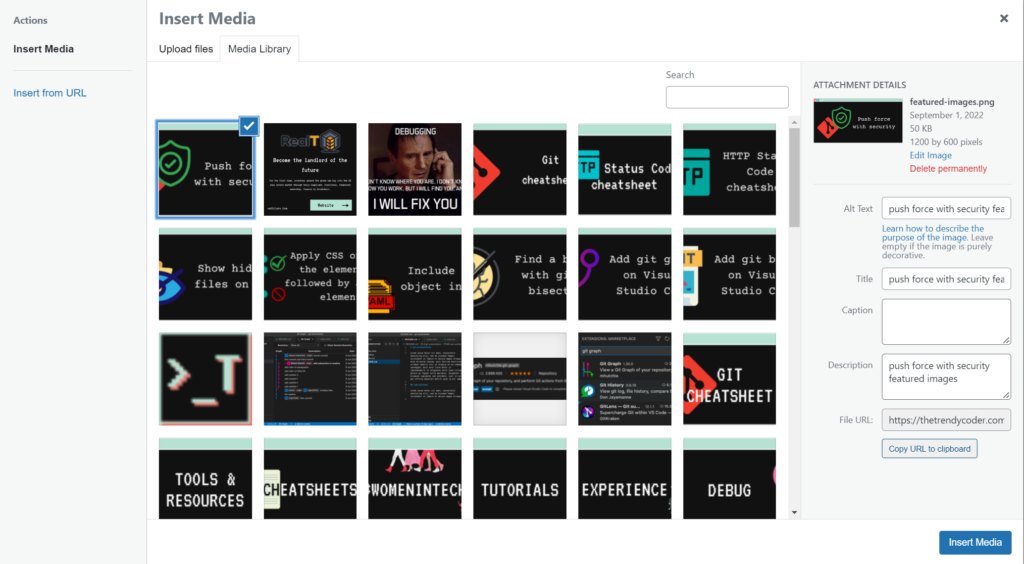
A pop-in will open up, showing you the images already available in the media library. In your case, select the tab Upload files to upload new images.
Once your image is loaded, make sure to fill in 3 area on the right panel : The alt text, the title, and the description. This is very important for SEO and especially for accessibility.
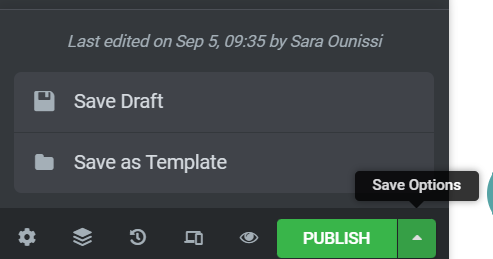
Save your work
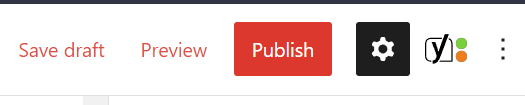
Your work is saved automatically by Elementor. However, if you want to make sure to save a draft, you can click on the arrow next to the green button publish (bottom left corner) and select save draft. That’s what you do if your article is not yet published. However, if it is already live, and you are just fixing some things or adding some content, you can click publish directly.
WordPress Editor
Let’s say that you are done with the content of your article on Elementor. Everything looks great and you saved your work. You have some last steps to finish on the WordPress editor, and you are ready to publish.
If you go back to the WordPress dashboard, all posts, you will see your current post in the list. When you hover you have different options : Edit, Quick Edit, Trash, Preview, Elementor Edit.
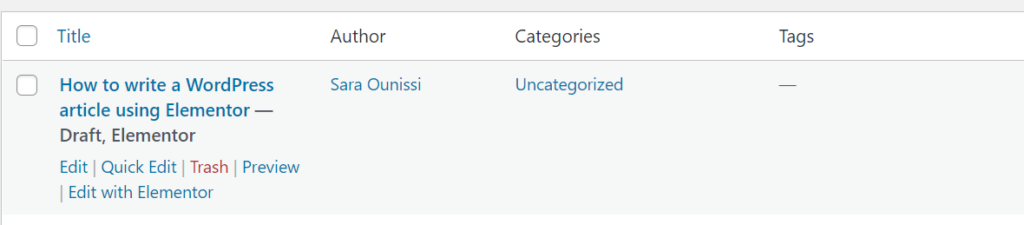
If you select Edit you will access directly the WordPress Editor, and if you select Edit with Elementor you will have access to the Elementor page builder page. Also, you can see that the article is Uncategorized, and there are no tags related to it. That is what we are going to fix. To do so, we are going to click on Edit (WordPress Editor)
Select a category
On the right side panel, you can scroll down until you reach the category section, as you can see on the screenshot below.
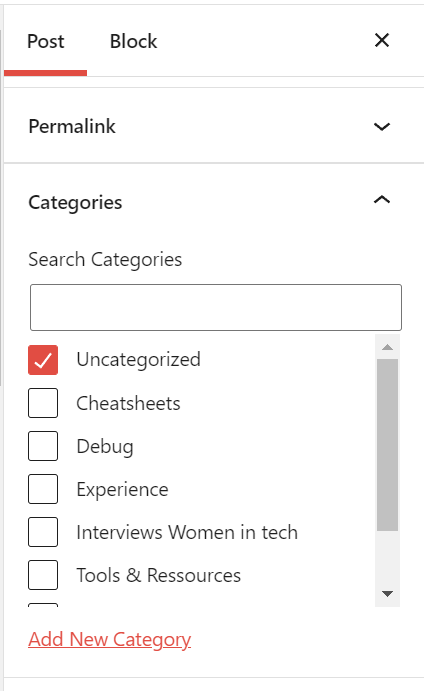
In this section you can select the category related to your article, you can select one or more. And if the category doesn’t exist, you can add a new one and select it. In our case, I’m asking not to create new categories but to select the best category that is already created and that matches the best with your content. Also, you can add more than one category, but the best practice is one article = one category.
As I am writing this tutorial to write this particular article you are reading, I will select the category Tutorials.
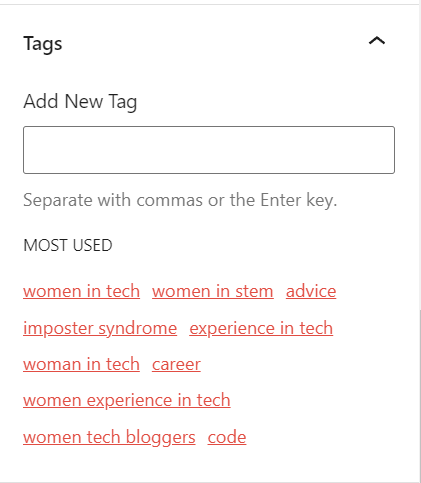
Add tags
Still on the right sidepanel, you can scroll down until you reach the Tags section. Here you can add tags that relates to your article. You can see that as the Instagram hashtags. You can use some key words, or combinaison of key words. For example in my case I will add : WordPress tutorial, Elementor tutorial, write article WordPress, write article elementor, guest writer tutorial, onboarding guest writer, publish article WordPress elementor…
Optimize SEO
Still on the WordPress Editor, on the main page, if you scroll down you will see a section called Yoast SEO. Yoast is a plugin that I installed to help me manage my SEO. I’m still learning a lot on the topic and this plugin makes it easier for me.
The main things that you need to fill in are The Focus key phrase and the meta description.
The focus keyphrase has to be some keywords that are in your title and really summarize the topic of your content. Note that this keyphrase has to be present in the first paragraph of your article, in the meta description, and a few other times in the rest of your article. SEO rules, not mine…
The meta description has to be a concise summary of your article, containing the focus key phrase. It has to be between 120 and 158 characters. Hopefully, you won’t have to count, you will see an orange-colored bar below your description until you reach the right amount of characters. And it will turn orange again if you add too many.
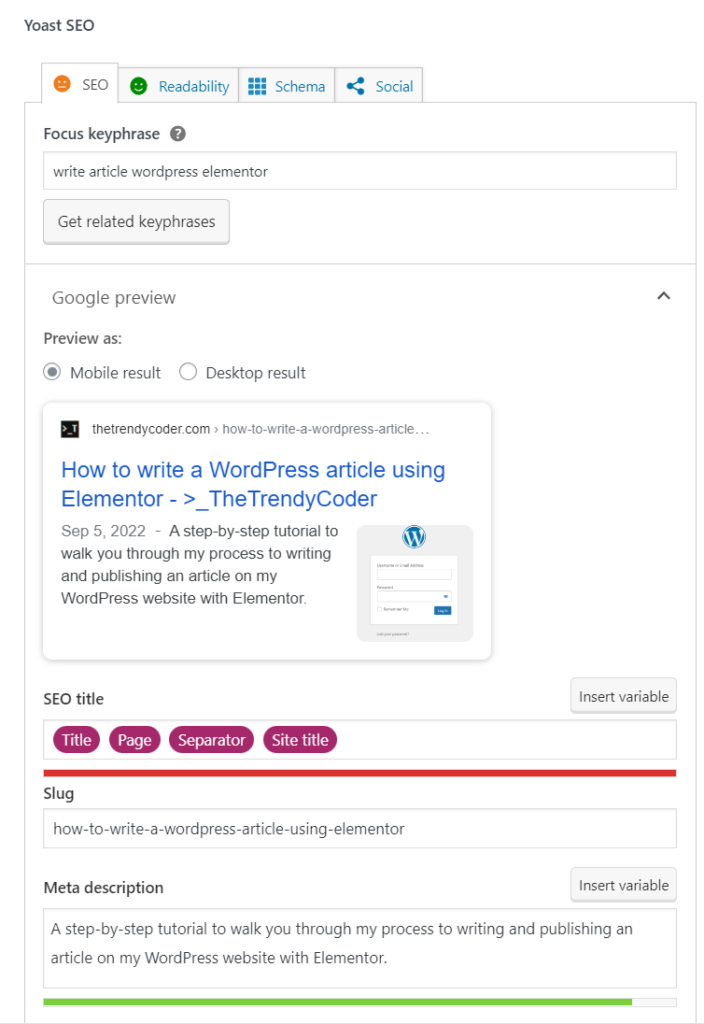
If you want, you can also change the slug, but by default, it will just be your post title. The other thing that I do is add pictures for the social previews. However, you don’t have to do it yourself because I use some specific templates of images that I created on canvas. I will handle this part.
If you go through all the tabs and sections of the toast plugin, you will see all the issues that you have regarding SEO and some advice on how you can fix them. You don’t have to follow all the steps, you can learn step by step to write articles that will be more and more optimized for SEO.
Preview and publish
Now you should be done with your article, you might want to see what it looks like before publishing. You can display a preview by clicking on the preview button in the top right corner. Select Preview in new tab. A new tab will open up with your article. Check it out.

Once you are ready you can publish your article by clicking on the publish button.
PS: you can also publish in the Elementor Editor if needed, as I mentioned earlier in the tutorial.
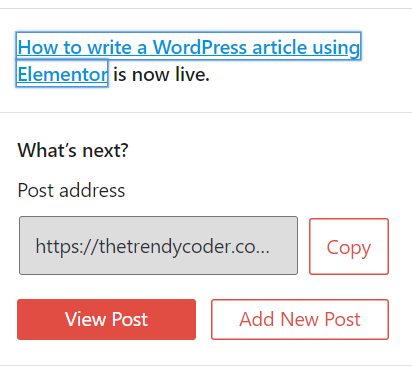
Once you publish through WordPress Editor, you have this message where you can get the link of your post (see screenshot below). You can save the link and share it with all your network.
More
I might have to add some elements myself to your article, such as a featured image and some links at the bottom. I use some specific templates for the featured image so I rather prefer to do it myself. However if you want something in particular that still works with the theme of my website we can talk about it. Regarding the links I will add at the end of the article, it’s also an SEO rule that encourages us to have multiple Internal links. Also, it helps me show the reader some other sections or articles that might seduce him and make him stay a bit longer on the website.
I really hope this tutorial is helpful and well-structured. If you see any missing information, you can contact me and I will do my best to make this tutorial as clear as possible.
If you are not a guest writer, and you are interested in this opportunity, click here.
Tools I use for this site
- I buy all my domain names on Namecheap, as thetrendycoder.com
- The hosting of this website is made on Bluehost.
- The website is created with WordPress.org (and not WordPress.com).
- I use the page builder Elementor because it makes it easy to create modern pages with drag and drop.
- I have multiple websites, and on most of them, I use themes from wpKoi. I love their design, they are very original and work well with Elementor.
- All the designs and images are created using canvas.
- I use Grammarly and languagetool to correct all my spelling and grammar mistakes.
- SEO is a big thing on a website, I use a WordPress plugin called YoastSEO to help me with the basic analysis. I also use a tool called Keysearch for choosing the right keywords.
- To handle affiliate links, I use two platforms: impact and ShareASale.
You want to write on TheTrendyCoder ?
If you are interested in publishing guest articles on this website, sharing your experience or coding tutorials, apply through this form.
NO EXPERIENCE needed!
NO PERFECT English needed!
NO DEGREE needed!
NO AGE limits!
No matter at what stage we are in our tech journey, we all have learned things and experienced things. Sharing them can help others and even help us. So, if you are a student, a professional, or a self-taught coder, feel at home and share some of your knowledge with the community.


If you want to share your experience as a female student or professional in tech, don’t hesitate to fill in the form linked below. It is a great chance to be featured in our next interview posts and inspire other girls and women to join us.